Showing posts with label Nuture circle. Show all posts

Saturday, February 2, 2019

Feb 2019 do.good.stitches Nurture Circle - Moda Love

           Ladies since it is Valentine's day this month let's feel the love in this quilt. For this month we will be making 2 12" blocks of the Moda Love pattern. Take a peak at the 3rd page for instructions for the 12" block. 
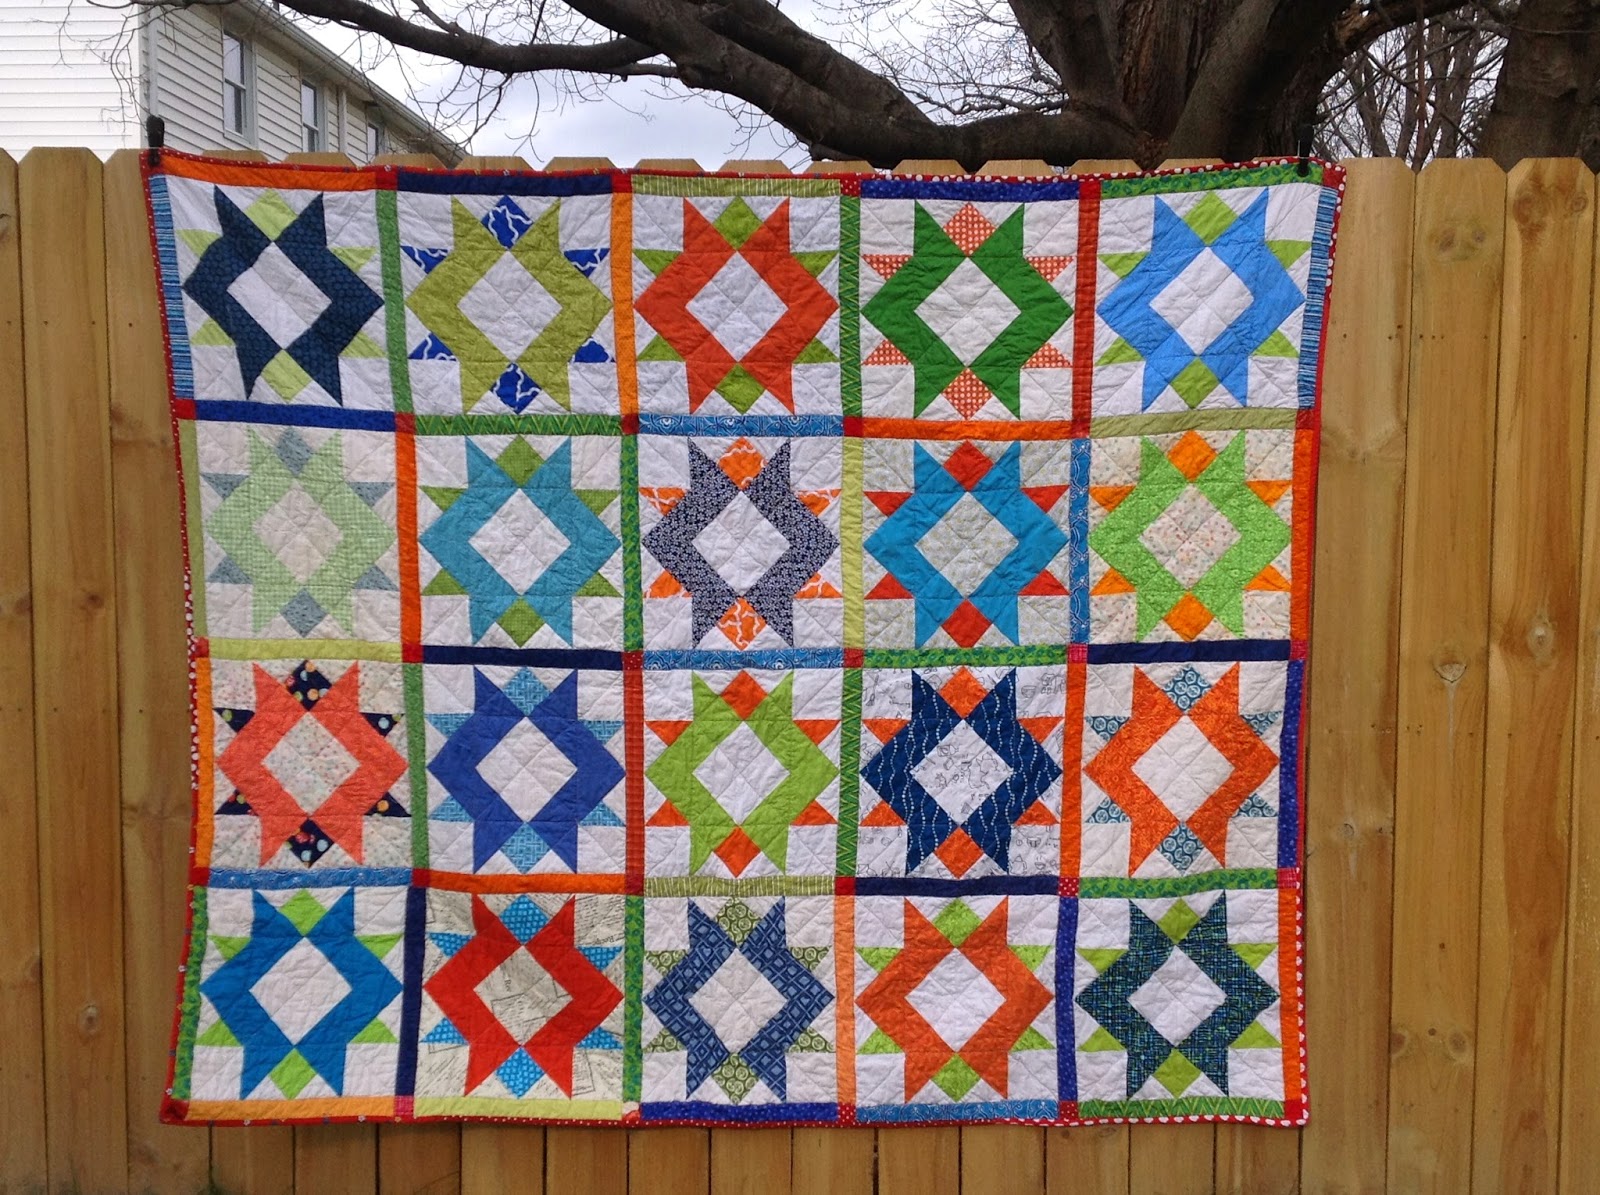
         To start off we are going to make one red block with a grey star in the middle and one grey block with a red star in the middle. Feel free to raid your scrap bin and mix it up. 

Step 1: Cut 18 - 2.5" Red Squares, 18 - 2.5" Medium to Dark Grey Squares, and 36 - 2.5" white, white on white or low volume Squares.

Step 2: Draw diagonal lines on the back side of the 36 - 2.5" background (white squares)

Step 3: Match a background square with a 2.5" red or grey square, right sides together.

Step 4: Stitch a 1/4" on each side of the diagonal line on the background square
 
Step 5: Cut on the diagonal line, press toward the dark side, trim HST to 2"

You should now have 36 - 2" red HST and 36 - 2" grey HST


Step 6: Cut 12 - 2" Red squares, 12 - 2" Grey Squares, and 32 - 2" Background Squares


Step 7: Arrange squares according to the layout in the Moda Love link. The star in the middle should be the opposite color than the outer ring. You will need 12 HST of the alternate color to  make the star in the middle. 


Step 8: Sew together the rows and press the odd numbered rows to the left and the even numbered rows to the right. Sew the rows together nesting the seams, Press the final seams of the rows in the same direction, either up or down. Your finished blocks will look like the samples below. 


Tuesday, July 5, 2016

Y do the seams hate me

The Nuture circle of do.good.sitches this month was a supersize castle block. The original post was from Amy from the Badskirt blog for Sew Mama Sew. The link can be found here. It is my first adventure into Y seams. I have avoided many quilt blocks with Y seams. It seems like it was a wise choice on my part. 

I have been working on this block for about a week. It has been a long process to get the one block finished. There was alot of seam ripping and cursing. I had some trouble getting the block to lie flat. In the end it got as good as it was getting with much starch and alot of cursing.

The request for colors in this block are below

Here are the color/design guidelines:
1. Outside corners should be solid, true, white
2. Inner square ring should be a gray / neutral 
3. Fussy cut center octagon if it makes sense with the fabric you're using (see hints and tips below on how to do this)
4. High contrast between diamonds and outer ring of trapezoids. (My sample block is good, but I'd like even higher contrast). 
5. Trapezoids and center octagon should be in the same color family
6. If the outer ring is directional fabric you will need additional fabric - otherwise your trapezoids will alternate directionality.
7. I'd like to keep the diamonds cool colored, and the trapezoids and octagon warm colored.

I dug out some very funky print for the center. I think it is Robert Kaufmann. It looks like a crazy Hawaiian shirt. It is one of those prints that is really better suited for large blocks. On  the down side we usually make 2 12" blocks and this month we made 1 jumbo block that was almost 21". It ate up alot more fabric that normal. Here is the finished block, I could have kept fussing with it but it wouldn't have ended well.


I hope the quilt turns out awesome but I can't imagine making a whole quilt of these blocks. If I were to make it again it would be one block for a pillow or a baby quilt. I am glad its done!!!!! Crossing this one off the list!

And just for a dash of cute here is a picture of my doodlebug in her 4th of July finest.

Monday, July 4, 2016

May Quilt Nuture circle of Do.Good.Stitches

Finished up the May quilt for the Nurture circle of Do.Good.Stitches. Technically I am not yet done with the March quilt but I got stuck on this one. You know how it is when you get focused on a project and can't do things in the order you know you should. So here it is!


I used a chunk of fabric for the backing that I have had for 5 or 6 years that reminded me of the pattern on the front. I finished the back with a Kona solid called Lagoon which I have most of a bolt of. I happened upon it at a yard sale. Technically I think it was the estate of a quilter that had gone toward the light. I took it as my mission to use the fabric in her honor. So this is one of the many projects its has made it into. 


For the binding I used a fun mix of bright prints from my scrap bin and a few jelly roll strips. 
I love how it turned out!


Monday, June 27, 2016

Hollywood Squares Flimsy

My dear husband was baby wrestling this weekend and playing video games which gave me a chance to do some sewing. I haven't yet been able to baby proof my craft room to the point where she won't kill herself. So all baby containment has to be in other areas on the house.

I was able to finish the quilt top for the May Nurture circle of Do.Good.Stitches. I blogged about it here and also here. I have been calling the quilt Hollywood squares but once I got it together it reminds me of these God's eye crafts that we used to make at summer camp.

So here is the quilt top as it is hanging on my all. Even thought it doesn't want to hang flat.

I also found this fabric in my stash that I have had for quite some time. It reminds me of the pattern of the quilt top. The selvage edge says 2010 so I guess I have been lugging this around for at least 5 years. It isn't the fanciest quilting fabric but I think it will go great with the quilt top. So whenever your husband says why do you keep buying fabric here is the reason, some day I will have just the right project for it!


Pictures of the finished top to follow.


Saturday, June 25, 2016

Sewing Saturday

My sweet husband was in charge of baby wrangling this evening so I was left to sew sew sew. I decided it was time to put together the May quilt for the Nuture circle of Do.Good.Stitches. 

I started playing around with the layout a few weeks ago and came up with this rough idea. 
Pardon the messy bed and I was waiting for a few more blocks to come in the mail. 
I decided to sketch up a layout that would use all the blocks but discovered that I needed a few more to make it happen. I hit the scrap bin and whipped up two more with black centers and two more with black boarders. 


Now I juts have to work up the courage to slice up some of the blocks into halves and quarters. Here goes nothing!!!!

More pictures to come of the finished product.

June Blocks for Nuture Circle

For a variety of reasons I have been slacking on sewing and posting on here. Most likley it is the 11 month old that is cruising around my house and the baby that is on the way. The newest Peach is coming August 2016. I think with the second arrival I should just board up my sewing room and call it quits. I will hold out hope that with the help of my hubby and sneaking away late at night I will get some stitching in. 

Here is my most recent completed project. This month the Nuture circle of Do.Good.Stitches decided to make blocks for the people were effected by the wildfires in Fort McMurray Alberta Canada. The original post of from SLO Studio and can be found here. Although this is wrapping up at the end of the month you can always click on the link if you would like the tutorial to make the Maple leaf block. They requested the blocks in the colors of the Alberta flag (red, white, blue, yellow, and green). The fabrics could be solids or prints. I dug into my stash and found some fabrics from my "how did I end up with these fabrics collection". Great fabrics but for some reason they have been in my stash for too long. Usually fabrics that arrived in a scrap package, yard sale or clearance rack. Fabrics that I had a plan for and it didn't work out or fabrics that were too cheap to pass up. Hopefully these leaves will make the quilt recipients happy and warm. 


Posting at Finish it up Friday with Crazy Mom Quilts.

Monday, May 16, 2016

March Flimsy Finished

The March block for the Nuture circle of Do.Good.Stitches quilt is called Picnic Pinwheel by Patch the Giraffe. I love her eye for color and quilt designs. This is just one of many of her quilts that I want to make!!! I choose a pallet of teal, magenta, purple and orange. I was going for bright bold colors to create a happy quilt to bring sunshine to the recipient of this charity quilt. The charity that we sew for is called Covered in Love. The original post is here if you wish to go back and take peak.

I finally wrangled up all the blocks and got enough time to sit down and put it together. I took for granted how much easier it was to sew when the baby was in a rock and play and stayed put. Now she is rolling, crawling, trying to pull herself up and flinging whatever she can get her tiny mitts on. Hopefully this will be the only time she is hanging off a pole. She is going to turn 1 year in July and become a big sister in August. I should just close up my sewing room for the next decade. 


Here is the quilt top all sewed together with the blocks from the circle. I love how the top looks all together. It always impressed me when I give the group a color pallet that no one leans towards one or two colors. We always end up with a nice distribution of all the colors. This block looks complex but comes together really quickly, is easy to cut and sew and looks great every way I have seen it. I may have to make one for me! I have a couple teal backing fabrics for this quilt. I never can decide which to buy so I buy more fabric than I need. I blame it on the minimum order requirement for free shipping. But it might be the reason I have a shamefully large stash. 


Will post pictures once it is all finished!

Sunday, May 1, 2016

Nuture Do.Good.Stitches-Hollywood Squares!

It's my month again as the quilter for the Nuture Do.Good.Stitches circle. I haven't finished March's quilt yet but I got some blocks very late! It's on my list of things to do. This months block should be quick and easy. Most of the instructions are on fabric choices and seam direction.

First go through your scrap bin and gather all your strips and strings, bold colors and black fabrics. No white if at all possible. No pastels! The strips should be 1.25"-2.5" wide. If you don't have scraps then jump into your stash.

For this quilt each participant is going to make 2 block, finishing at 12.5" square.  The first block starts with a 2.5" square of bold fabric. Sew a string/strip 1.25"-2.5" to 2 sides of the square,
Press the seams toward the surrounding ring and then trim down to the width of the central square,
Sew the same fabric to the remaining two sides of the square, press to the outside, and trim down.

The resulting square should look like this.

We will continue adding rings to the block in the pattern of a traditional courthouse square block.

-If you are using busy prints alternate rings with solid or tone on tone prints.
-Center should be 2.5" before sewing
-Rings should be 1.25"-2.5" before sewing
-Finished blocks should be 12.5"
-One block should have a black center
-One block will have a black final ring
-All other parts should be bold colored fabrics.
-No/Minimal white
-No pastels
-Press all seams to the outside.


Wednesday, April 27, 2016

April Nuture Do.Good.Stitches Blocks


This is the block for this month. It was blogged about here by my the quilter this month Louise. It came together pretty quickly and reminded me that I have no solid orange fabric. I have yet to figure out how to sew together long strips of fabric and not have them curve. The suggestion of sewing open the seams helps some. I can't wait to see how this comes together. 


Tuesday, March 1, 2016

March Blocks - do.good.stitches - Picnic Pinwheel

This month I asked the group to choose between these 3 blocks.
The general vote was that I like star blocks (which is true) and the vote was split between the 2nd and 3rd option. I decided to go with option 2. This block by Patch the Giraffe. 

The difference is that we will be using the following colors. Fuchsia, Teal, Orange, Purple. When you pick your fabrics please pick jewel tones that are either solids or tone on tone prints, minimal white in the fabrics if any.

Our background color will be white like the finished quilt here.

The only thing that is changing from the original tutorial are the colors used. You can pick any 4 fabrics you would like, as long as they are Fuchsia, Teal, Orange, Purple and are solid or tone on tone. So if you want to use 2 teal fabrics, 1 orange and 1 purple feel free. Just 4 different fabrics + white background fabric in each block. You will make 2 blocks that will finish 12.5"

White/Background: 4 - 4.5 inches square, 8 - 2.5 inches square
Fabric 1: 4 - 6.5 by 2.5 inches
Fabric 2: 4 - 4.5 by 2.5 inches 
Fabric 3: 4 - 2.5 inches square
Fabric 4: 4 - 2.5 inches square 

Thursday, February 25, 2016

Feb Blocks for do.good.stitches

This block was a fun one this month. The post is here if you want to follow along. It was a good way to use up some scraps from the bin. I think this will make a nice quilt once it comes together. Next month will be my month to lead the group. Stay tuned for the fun and exciting block!
Linking up to Finish it Up Friday @ Crazy Mom Quilts

Friday, January 15, 2016

Of the Forest

This month we are back to quilting with the Nurture circle for do.good.stitches. This month was a tough one with paper piecing. We had to choose one block from the Forest QAL that can be found here. I choose the woodpecker as I thought it looked easier. I was also drawn to the roaring deer block. In hind sight I don't think it was the easiest block. It resulted in some serious cursing but on the plus side ate of some scraps from my bin. With the exception of the light blue all the fabric in the block came from my scrap bin. I can't wait to see what the other girls created but I am hoping for a much easier block next month.
Linking it up to Finish it up Friday @ Crazy Mom Quilts

Friday, July 10, 2015

Laundry list of excuses......

I could go through a lot of reasons why it took me so long to finish this quilt....

* Pregnant - and it's hard to quilt while you are sleeping
* Millions of drs appointments - See Pregnant Above
*Broke Machine - Now twice, and I have put it in the corner to think about what it's done
*Vacation - Went to Boston and New England - I was busy eating chowda
Home Renovation - My kitchen is a hole where a kitchen used to be

Now that you have pictured your favorite excuse here is the quilt


This is the March quilt for the Nurture Circle of Do.Good.Stitches
It should have been done by the middle of May
Little late, but it's done!!!!!
And once I finished quilting it I had to beat off a horde of mosquitos to get the picture.
The rain has been something else and now our backyard is a breeding ground for pests and mud.

And just to top off the list of things to do right before you have a baby I am thinking about getting an English Springer Spaniel puppy to go with the one I have. They will be a matched set!


Linking up to Finish it up Friday @ Crazy Mom Quilts

Tuesday, June 30, 2015

Nuture Do.Good.Stitches July Block

It is my month again for the Nurture circle of Do.Good.Stitches charity quilt. Since 4th of July is right around the corner I took inspiration from this quilt, called Americana Rose.


 I switched around the colors some and removed the 4 patch blocks. 

For these blocks I would like you to select  Cherry red, White and Royal blue prints that are tone on tone or solids. You can choose one fabric of each color or raid your scrap bin. 

Cut the following from your fabrics. 
A - BLUE - 3.5" X 6.5" - (4)
B - BLUE - 4.5" X 4.5" (4)
C - BLUE - 3.5" X 3.5" (4)
D - BLUE - 1.5" X 2.5" (20)
E - BLUE - 1.5" X 1.5" (20)
F - RED - 1.5" X 1.5" (40)
G - RED - 2.5" X 2.5" (5)
H - WHITE - 3.5" X 3.5" (8)
I - WHITE - 6.5" X 6.5" (1)


Step 1: Using A and H sew together 4 flying geese blocks

Step 2: Take the  flying geese you created and lay them out with C and I blocks in the pattern below.

Step 3: Sew together each row of pieces pressing toward the solid squares
Step 4: Sew together each row with the seams nesting

The final big star will look like this - kapow!
 And will finish up at 12.5" x 12.5"

For your second block you are going to create many many flying geese (so sorry!!!!)

Step 1 - Take your D and F pieces and create 20 wee mini flying geese....

Step 2 - Take 4 of the mini geese you created in the last step and add together with 1-G square and 4-E squares and lay out in the orientation below.

Step 3: Sew together each row of pieces pressing toward the solid squares
Step 4: Sew together each row with the seams nesting

 Repeat 5 times and you will end up with blocks looking like the ones below

Step 5 - Lay out your red and blue stars you just created with 4-B blocks.

Step 6: Sew together each row and press toward the solid blocks
Step 7 - Sew each row together and next the seams.

The resulting block will look like the finished square below.
It will finish at 12.5" square

Please send them to me at the address below.

Dhia Peach
519 Smith Road
Fremont, Ohio 43420

freshly pieced

Sunday, March 1, 2015

March Do.Good.Stitches Nuture Circle Quilt

It is my second turn as quilter for the Nuture circle of Do.Good.Stitches. My first go round was last August and we created this fun quilt. If you are so motivated to make this block you can find instructions here.


I have been on a kick working on my Triple Irish Chain quilt in recent weeks.


I figured since it is March I would continue with the Irish theme and my obsession with this classic pattern. I have a shameful amount of blue fabric in my stash and scrap bin so I decided to go with blue as the color pallet for this quilt.

To begin we are going to cut our fabric for the two blocks we will be making for the triple Irish chain quilt. I have decided on a scrappy theme for this quilt to make it more stash friendly. You will need to raid your stash or scrap bin for white or low volume fabric, light-medium blue fabrics (blue and white only) and dark blue fabrics (blue and white only). 

White/Low volume
1  -  10.5" x 10.5"
4  -  6.5" x 2.5"
17  -  2.5" x 2.5"

Light Blue - Medium Blue
24  - 2.5" x 2.5"
**Additional Note** Some of my fabrics did not read with as much contrast from the white fabric in the final block. Make sure to select blues that have good contrast from the background. 

Dark Blue
20  - 2.5" x 2.5"


Then we will begin assembling the blocks according to the following diagram. 
Block A
Lay out your 2.5" squares and sew together the 7 squares in each row. Once each row is completed press the seams. Rows 1/3/5/7 will go in one direction and rows 2/4/6 will go in the opposite direction. Once you have pressed your seams sew each row together with the seams nesting,

Your finished block A should look like this. (14.5" x 14.5")


Block B will be assembled using the following diagram
To begin assembly of this block take each 6.5" x 2.5" rectangle of white fabric and sew a dark blue 2.5" square to each end. Press the seams toward the dark blue fabric. I will refer to these as a side unit.

Take two of these side units and attach a 2.5" light blue square to each end. Once you have sewed the light blue fabric on press the seams toward the dark blue fabric, These are now top units. 

Take your 10.5" square of white and sew on a side unit to opposing sides. Once you have completed press your seams toward the side units. 

The final step is to sew the top units to the two remaining sides of the 10.5" white square. The seams should nest. Once you have completed sewing press your seams toward the top units.

Your completed Block B should look like this. 


In the end you will end up with two blocks that look like this. They should finish about 14.5" square. Please do not sew together.


Once completed please send to

Dhia Peach
519 Smith Road
Fremont, Oh 43420

Linking it up to Freshly Pieced WIP Wednesday