Greetings.....Welcome to the Peach Patch if this is your first visit......I've been oftly quiet recently.....
Today I am posting a tutorial which I hope you will enjoy. This is my first month as quilter for the Nurture circle of do.Good.Stitches. I had been trying to get involved with this program for some time and some space opened up. As a bonus the Nuture circle makes quilts for one of my favorite charities; My Very Own Blanket. I have had the chance to make quilts for this charity before and go to the workshop to sew in Ohio. I struggled to decide what block to pick for the quilt. I flipped back and forth from traditional blocks, tutorials already floating around the internet or creating one of my own. In the end I created on of my own, at least I haven't seen it before. As of now I am still working on a name for this block
.....Spider Star
......Crab Star
........Sunshine Star
.....Supernova/Exploding Star
....I haven't figured it out yet, send your suggestions.....

So to get started on this block we first need to select our fabrics. For this block we are going to have three fabrics. For this quilt I would like to keep the color scheme to Blue/Green/Orange. I would prefer bold jewel tone fabrics that contrast well with the background and colors that are complimentary to each other. Please stay away from pastels for this project.
A - Background star points- Blue or Green or Orange
B - Main star - Blue or Green or Orange
C - White/Cream/Low volume background fabric

A - Background star points- Blue or Green or Orange
1 - 8" Square
B - Main star - Blue or Green or Orange
6 - 5" Squares
C - White/Cream/Low volume background fabric
1 - 8" Square
2 - 5" Squares
4 - 4.25" Squares
Once we have our fabrics take the two 8" blocks (A & C) and place them with front sides facing and sew a 1/4" seam around the entire perimeter of the block.


Set the seams and press open

Press the seams open


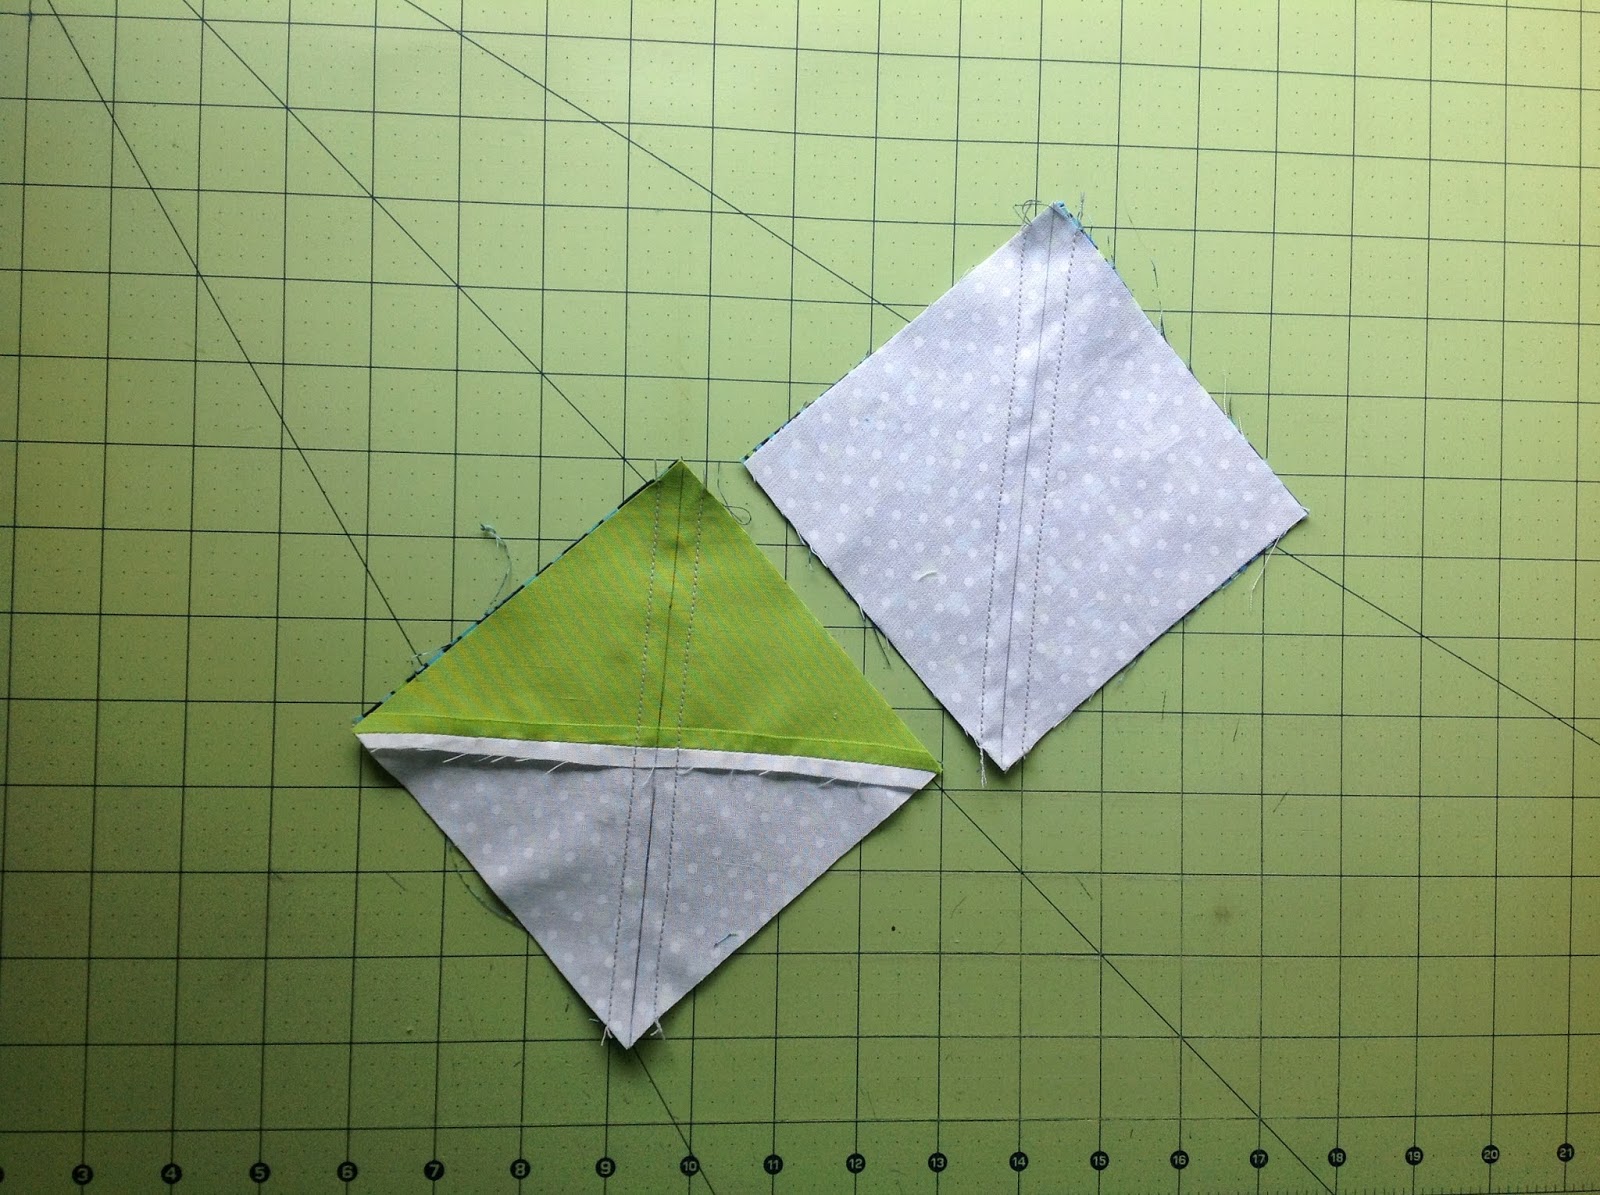
Draw a line perpendicular to the seam of each of the half square triangle blocks as well as on the diagonal of the 2 5" (C) blocks. Pair one 5" (B) block to each of these and lay them face to face.

These lines are used as a guide. Sew a straight line 1/4" from the mark on both sides. Using your rotary cutter, cut these 6 squares along the mark between the two seams.
You should now have 4 of each of the following

Set the seams and press them open on each of the blocks


Now to assemble the star yet to be named block
Place the 4 4.25" (C) blocks in each of the corners
Place the 4 4.25" HST in the middle with white facing in
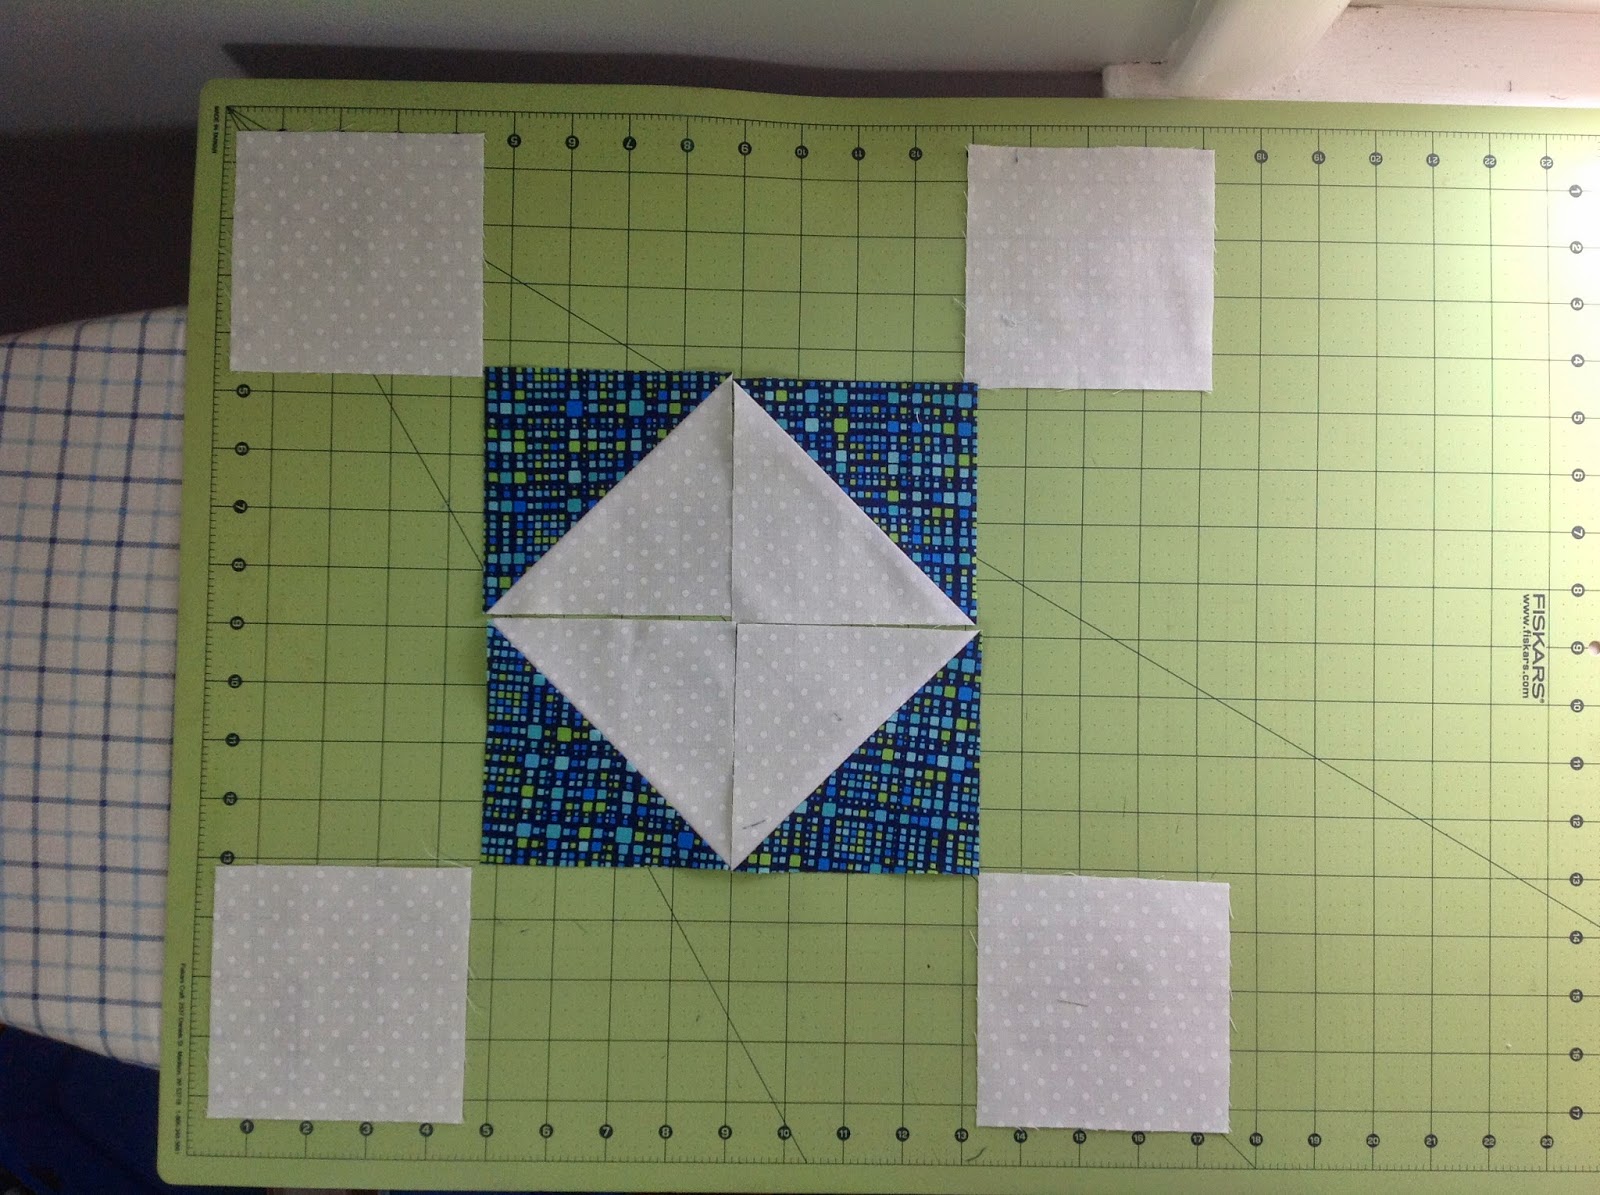
Next place the squares with the accent fabric to the right as shown below

The remaining squares with the accent fabric to the left finish out the layout

Sew each row together and press the seams open
Beware that the intersection at the corners of the inner white square are bulky and should be sewed and pressed carefully


Please make two blocks and send to the address below.
Feel free to contact me with any questions :)
Dhia Peach
519 Smith Road
Fremont, Ohio 43420
.....Spider Star
......Crab Star
........Sunshine Star
.....Supernova/Exploding Star
....I haven't figured it out yet, send your suggestions.....
So to get started on this block we first need to select our fabrics. For this block we are going to have three fabrics. For this quilt I would like to keep the color scheme to Blue/Green/Orange. I would prefer bold jewel tone fabrics that contrast well with the background and colors that are complimentary to each other. Please stay away from pastels for this project.
A - Background star points- Blue or Green or Orange
B - Main star - Blue or Green or Orange
C - White/Cream/Low volume background fabric
The fabric cutting for this block is pretty simple.
1 - 8" Square
B - Main star - Blue or Green or Orange
6 - 5" Squares
C - White/Cream/Low volume background fabric
1 - 8" Square
2 - 5" Squares
4 - 4.25" Squares
Once we have our fabrics take the two 8" blocks (A & C) and place them with front sides facing and sew a 1/4" seam around the entire perimeter of the block.
Next cut the block on the diagonal in both directions
Set the seams and press open
Press the seams open
Line up the 45 degree line on your ruler up to the seam of the block and trim down to 5"
Draw a line perpendicular to the seam of each of the half square triangle blocks as well as on the diagonal of the 2 5" (C) blocks. Pair one 5" (B) block to each of these and lay them face to face.
You should now have 4 of each of the following
Set the seams and press them open on each of the blocks
Line up the 45 degree line on your ruler up to the seam of the block and trim down to 4.25"
Add the remaining 4 4.25" (C) blocks and you should now have 4 of each of the blocks below
Now to assemble the star yet to be named block
Place the 4 4.25" (C) blocks in each of the corners
Place the 4 4.25" HST in the middle with white facing in
Next place the squares with the accent fabric to the right as shown below
The remaining squares with the accent fabric to the left finish out the layout
Sew each row together and press the seams open
Beware that the intersection at the corners of the inner white square are bulky and should be sewed and pressed carefully
Sew each row together and trim the block down to 15.5" square
Please make two blocks and send to the address below.
Feel free to contact me with any questions :)
Dhia Peach
519 Smith Road
Fremont, Ohio 43420
I finished my blocks but I wanted to mention that I trimmed my first block to 15" but I lost most of the seam allowance around the points, so I didn't trim my second one. Should it say 15.5" instead of 15"? I'll send the second one untrimmed and you can decided what to do with it.
ReplyDelete